RecyclerView on BottomSheetDialogFragment
こんにちは、最近Androidもくもく勉強会を始めたすみーです。
次回は2/15(水)なので興味がある方は参加いただけると嬉しいです。
Doorkeeper
次回はKotlinの勉強をしようかと思っています。
本日は、MaterialDesignのModal bottom sheetsを再現出来る、BottomSheetDialogFragmentの使い方をざっくりと紹介したいと思います。
※ QiitaなどのサンプルはBottomSheetDialog + LinearLayoutで要素固定が多いので、BottomSheetDialogFragment + RecyclerViewのパターン
表示仕様
- RecyclerView部分は固定の高さで、BottomSheetDialogFragment表示時にTitle, Cancelボタンは見える状態としたい。
レイアウト定義
res/layout/layout_bottom_sheet.xml
<LinearLayout xmlns:android="http://schemas.android.com/apk/res/android"
              xmlns:tools="http://schemas.android.com/tools"
              android:orientation="vertical"
              android:layout_width="match_parent"
              android:layout_height="wrap_content">

    <TextView
        android:id="@+id/title"
        android:layout_width="match_parent"
        android:layout_height="?actionBarSize"
        android:gravity="center"
        android:textSize="16sp"
        tools:text="タイトル"/>

    <android.support.v7.widget.RecyclerView
        android:id="@+id/recycler_view"
        android:layout_width="match_parent"
        android:layout_height="320dp"/>

    <Button
        android:id="@+id/cancel_button"
        android:layout_width="match_parent"
        android:layout_height="?actionBarSize"
        android:text="キャンセル"/>
</LinearLayout>
MyBottomSheetDialogFragment作成
- BottomSheetDialogFragmentを継承したクラスを作成します。
List<String> list = new ArrayList<String>(){{
                    add("hoge1");
                    add("hoge2");
                    add("hoge3");
                    add("hoge4");
                    add("hoge5");
                    add("hoge6");
                    add("hoge7");
                    add("hoge8");
                    add("hoge9");
                    add("hoge10");
                    add("hoge11");
                    add("hoge12");
                }};

    @Override
    public void setupDialog(final Dialog dialog, int style) {
        super.setupDialog(dialog, style);

        final View view = View.inflate(getContext(), R.layout.layout_bottom_sheet, null);
        dialog.setContentView(view);

        ((TextView) view.findViewById(R.id.title)).setText("タイトル");

        StringAdapter adapter = new StringAdapter(getActivity(), list);

        final RecyclerView recyclerView = (RecyclerView) view.findViewById(R.id.recycler_view);
        recyclerView.setLayoutManager(new LinearLayoutManager(getActivity()));
        recyclerView.setAdapter(adapter);
    }
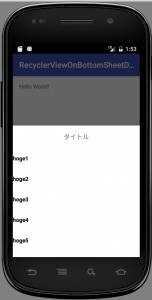
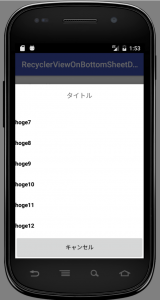
表示結果
改良
- キャンセルボタンを表示するためには、Peekheightに表示レイアウトの高さを設定する必要があります。
- themeによりPeekHeightを設定する方法もありますが、layout_bottom_sheet.xmlの高さをPeekHeightに動的に設定したいため、例のごとくLayoutObserverによる対応を行います。
MyBottomSheetDialogFragment.java
    @Override
    public void setupDialog(final Dialog dialog, int style) {
        super.setupDialog(dialog, style);

        final View view = View.inflate(getContext(), R.layout.layout_bottom_sheet, null);
        dialog.setContentView(view);

        // adapter生成、セットなど省略

        view.getViewTreeObserver().addOnGlobalLayoutListener(new ViewTreeObserver.OnGlobalLayoutListener() {
            @Override
            public void onGlobalLayout() {
                view.getViewTreeObserver().removeOnGlobalLayoutListener(this);
                // BottomSheetのPeekHeightにviewの高さを設定
                View parent = (View) view.getParent();
                BottomSheetBehavior behavior = BottomSheetBehavior.from(parent);
                behavior.setPeekHeight(view.getMeasuredHeight());
            }
        });
    }
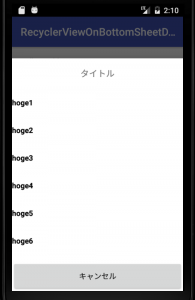
改良結果
- 項目数が多い場合も、少ない場合もキャンセルボタンが表示されるようになりました。
- この対応を行ったCustomBottomSheetDigalogFragmentを用意しておくと、色々な画面で使えて楽出来るかもです。
余談
普通やらないと思いますが、私は最初layout_bottom_sheet.xmlにRelativeLayoutを使っていました。そうするとrecyclerViewが高さがMatchParentになってハマるのでオススメしないです。。。かなりハマりました。
TAG

管理者
admin admin
-
TAG
- Android
- AWS
- Bitrise
- CodePipeline
- Firebase
- HTML
- iOS
- IoT
- JavaScript
- KPI
- Linux
- Mac
- Memcached
- MGRe
- MGReのゆるガチエンジニアブログ
- MySQL
- PHP
- PICK UP
- PR
- Python
- Ruby
- Ruby on Rails
- SEO
- Swift
- TIPS
- UI/UX
- VirtualBox
- Wantedly
- Windows
- アクセス解析
- イベントレポート
- エンジニアブログ
- ガジェット
- カスタマーサクセス
- サーバ技術
- サービス
- セキュリティ
- セミナー・展示会
- テクノロジー
- デザイン
- プレスリリース
- マーケティング施策
- マネジメント
- ラボ
- リーンスタートアップ
- 企画
- 会社紹介
- 会社紹介資料
- 勉強会
- 実績紹介
- 拡張性
- 採用
- 日常
- 書籍紹介
- 歓迎会
- 社内イベント
- 社員インタビュー
- 社長ブログ
- 視察
- 開発環境

